


On-time, quick movement of the storage units makes it all within the budget. It allows great flexibility along with creativity and efficiency in the store designs.
It will be very easy if the following Atlas User Guide is followed:
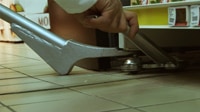
- Using the specially designed Atlas lever bar for grabbing the shelving outer foot. (Note- the lever bar does have an engineered notch that fits right into the major gondola systems.
- Make sure that the unit’s foot has been lifted by 3 cm or 1.18 inches. There must be enough clearance for the Atlas skates for sliding underneath.
- Just hold on tight so that the team made can place the accessory under the shelving unit. Not much effort will be required for using the lifting by which is long and bulky. Loads can be lifted easily.
- Slide in the Atlas skates. Make sure that it goes right under the shelving with the help of the adjuster can fully position it in the circular engineered slot.
- The foot down can be released now. If the Atlas user guide was followed rightly, the shelving is now fitted correctly.
The above-mentioned five steps are to be followed until every outer fort of the unit gets fitted. Make sure the Atlas lever bar is used right.
When unstable merchandise is loaded (such as liquids) on to the unit, ensure to remove 30% of the stock.
Enough of the Atlas Skates are required for moving:
- 5 bay gondola can be moved by using 1 case of 12 Atlas.
- 11 bay gondola can be removed by using 2 cases of 12 Atlas.
- 17 bay gondola can be removed by using 3 cases of 12 Atlas.
The above-mentioned 3 required to be done double-sided.
With all 4 Atlas Skates fitted on four sides, one person is required on each end for guiding the manoeuvre. It is essential for moving the desired unit to the designated area.
Note: in case required, the Atlas skates can roll within 360-degree turn capacity for making the positioning right.
After the shelving is done, each end of the unit is to be lifted using the Atlas lever bar for removing the Atlas skates from below it.

Instructions for Atlas Holding Bar™ Installation
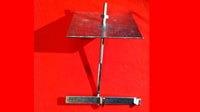
For ensuring maximum security, while the specific manoeuvres on the uneven floor, it is highly advisable to use the Atlas holding barsTM. It is a safety fixture that locks the units together. It is included in the 12 Atlas skates cases.
To use the barTM, the following steps are to be followed,
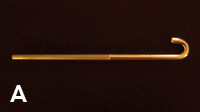
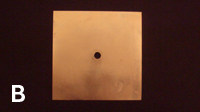
- Locking bar A is to be inserted from the plate’s (B) middle hole.
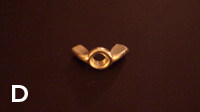
- It should be ensured that the hook is towards the bottom and towards the top is the wing nut (D).
- On top of the Gondola pole, the plate (B) is to be laid flat.
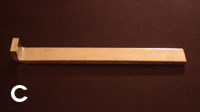
- In the 1st 4 slots, the sliding bar (C) is to be inserted on top of the pole.
- Ensure the sliding bar (C) went right through the hole (A) and out onto the opposite end.
- Once done, the wing nut (D) is to be tightened on the locking bar (A) for securing the plate on the pole’s top.
- Holding bars are to be fixed before Atlas Skates are positioned, and once Atlas Skates are removed, the holding bars are also meant to be removed.

Maintenance
Simple wiping is necessary for cleaning the Atlas skate with a dry cloth. Lubrication oil few drops will also be helpful if added. Atlas equipment and skates are always essential to be stored in their provided cases. Make sure that the area in which it is kept is completely moist and cold.


